Account settings
Account settings
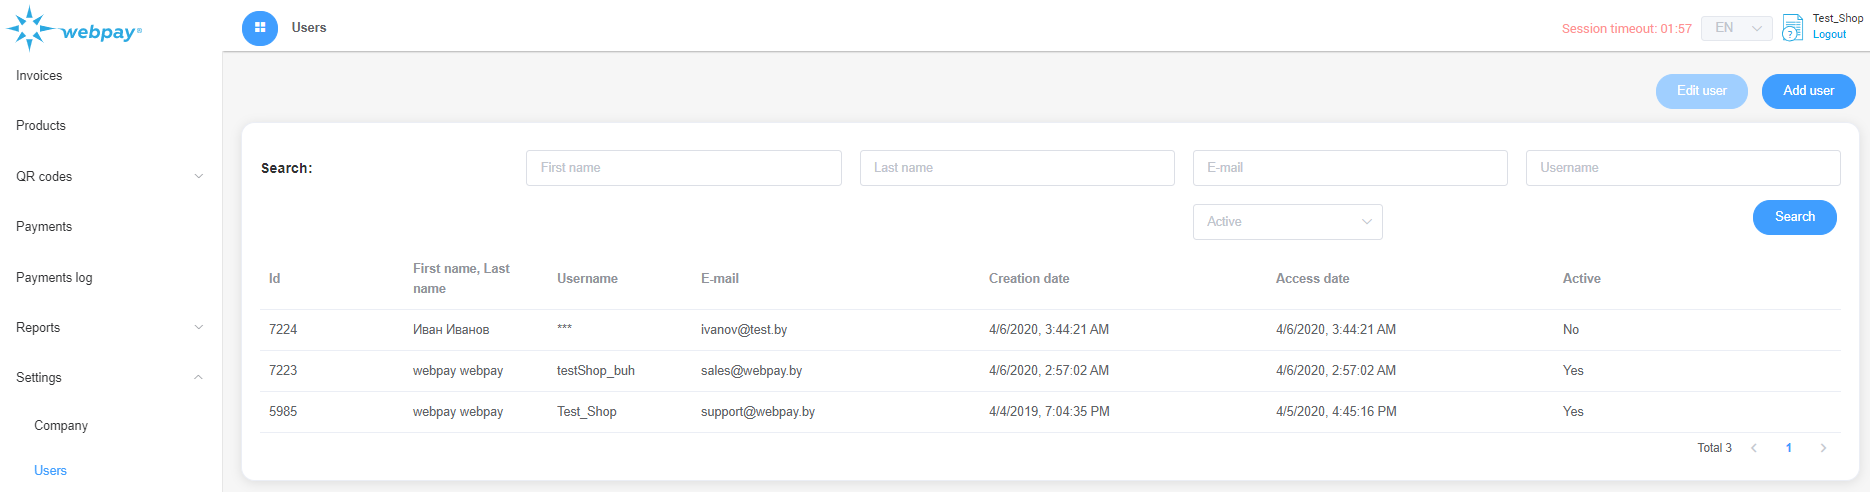
Open your user account and proceed to "Settings" → "Users". In this section, you can create, delete and manage the user accounts of your company that have access to the WEBPAY system.
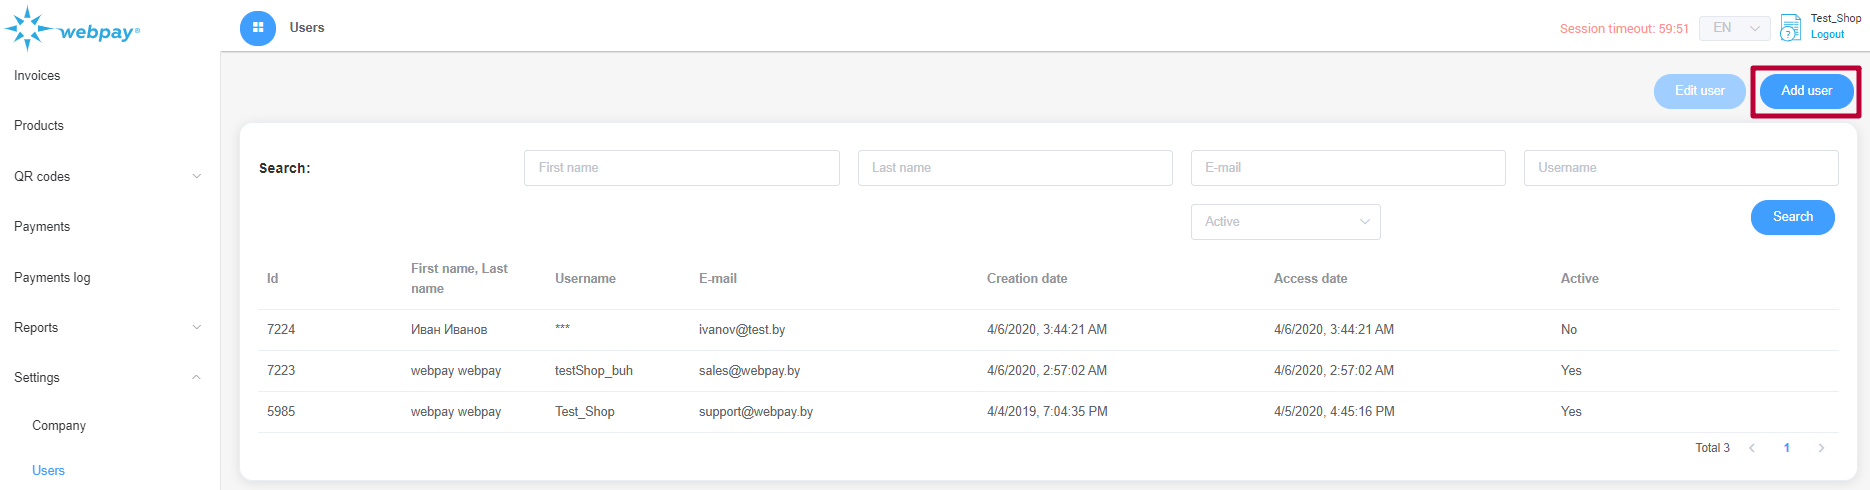
To create a new user, click on the ""Add User" button in the "Settings" → "Users".
You will need to specify the following fields in the popped-up form:
- username (login, 4 to 12 Latin characters),
- first name,
- last name,
- phone,
- email,
- country,
- state,
- ZIP code,
- city,
- address,
- password,
- password confirmation.
In the "Groups" list you should also specify the permissions for account owner:
- administrator,
- buyer,
- system account,
- guest.
If you want to allow the new account to create invoices and users and edit their data, you need to select "Billing Account" from the dropdown list.
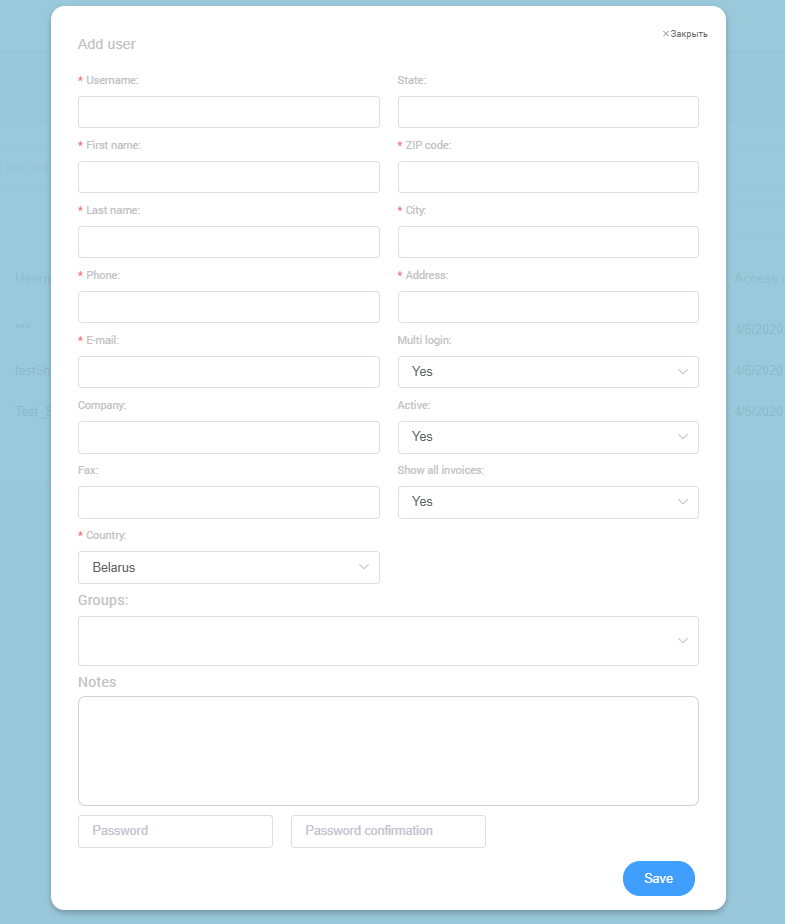
- in the "Multi login" field, leave it as "Yes",
- select "No" in the "Active" field if you plan to activate the account later. Otherwise, leave it as "Yes".
Click the "Submit" button to complete account creation.
You also have an ability to create accounts for your regular customers. To do this, select "Consumer Account" from the dropdown list. Then you will be able to make an invoice to that customer by selecting him from a list.
In the "Users" menu you can always check already created accounts or edit them. To edit an account, click the "Edit user" button in the top right corner of the screen.
